The Reporting Rules Engine enables extensive modifications to the printing process flow without the need for invasive code changes. This would in turn reduce project time and total cost of ownership.
For more details on the Report Rule Engine visit this overview page.
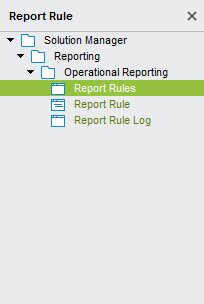
You may find Report Rule configuration forms at Solution Manager > Reporting > Operational Reporting

You can view or create new report rules from the Report Rule Overview.

| Rule Id | A unique Id is automatically created when you create a new rule. |
| Description | A display name to the rule which describe what the rule is. |
| Report ID | You can set one Report Id per rule. A rule will execute for all reports if the Report Id is set to blank. |
| Priority | The priority level which will decide in which order a report rule will overrule other rules. Rules with same priority will execute in the order of rule Id. If you have two rules with the same Report Id then the order of execution will be the priority and then the Rule Id. One main thing to note is that the rule with the highest priority will execute last to override other low priority rule outputs. For example if you have 3 rules with priority 1,2,3 the order of execution would be 3,2,1. |
| No Multi | Enabling this will prevent the rule from executing if multiple reports are select for single print job. This is checked by default. Disabling this will execute the report for all reports which meets the conditions and Report Id. Therefore it's essential to make sure that you have no action that would violate the confidentiality of the reports (eg. Emails sent after printing etc…) |
| Enabled | Enable or disable the report rule. |
Selecting one or more rules from Report Rule Overview, you can drill down to more details using View option from the context menus. A report rule has Conditions and Actions. When the Conditions are fulfilled, set Actions will be executed.

Conditions table have Ordinal , Logical operator , Expression 1 and Expression 2 , Operator and parenthesis ( , ) fields.
| Ordinal | This is a number which would define the ordinal of conditions. You can change the ordinal value to set the order of condition being interpreted. |
| Logical operator | Sets the logical relationship among conditions. A parenthesis of either ( , ) can be used to group conditions with logical operators. |
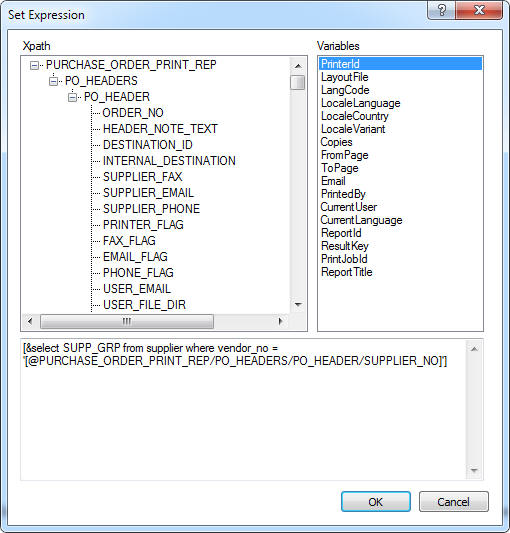
| Expression 1 Expression 2 | This can be any value including report properties, SQL statements, XPath or any combination of them which would reflect a final value. When you work with expressions, you can get help form "Set Expression Dialog". Select "Edit Expression 1" and "Edit Expression 2" from context menu to get the "Set Expression Dialog" |
| Operator | Used to evaluate the values of "Edit Expression 1" and "Edit Expression 2" |
Expressions in both Conditions and Actions can be of 3 types
You can use this as a programming language where each expression works as a placeholder for some value.
e.g
[&select identity from fnd_user where web_user=’[#CurrentUser]’]
[&ARCHIVE_API.Get_Report_Title(‘[#Reportid]’)]
You can use the "Set Expression Dialog" to create these expression with ease.
Set Expression Dialog
This dialog is used to select values in the report using XPath
from the Report XML or selecting Report Context Variables from the report process. Selecting XPath is only possible if the rule has defined a
Report ID. Selecting Variables will
set values from the report process to the expression. This dialog is also used
to set Action Property attributes values.
Actions table have Ordinal, Type, Property List and Enabled fields.
| Ordinal | This is a number which would define the ordinal of Actions. You can change the ordinal value to set the order of Actions being executed. |
| Type | There are different types of actions. You can select the action type you wish to execute when the respective condition is met. Action types are further descried below. |
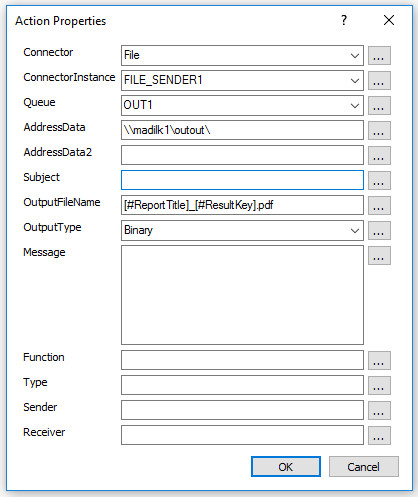
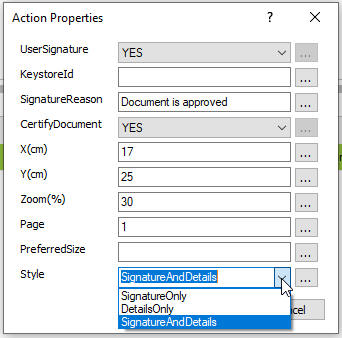
| Property List | Certain action types can have certain properties. You can set values for properties in the Property List field. Action Properties dialog will help you to find relevant properties for a selected Action type. Select "Edit Action Properties" from the context menu to open Action Properties dialog. The action properties listed in the dialog will vary depending on the action type. You can simple type a value or use the "..." button to bring up the "Set Expression Dialog" to select values. |
| Enabled | Enable or disable the action. |
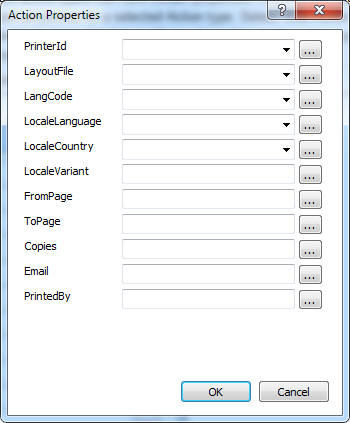
As mentioned before the Report Rule Engine is invoked by the Print Dialog. Print Dialog shows the default properties and forced properties for a print job. There are several levels of setting up these defaults using actions.
DocumentClass / DocumentNo : You can attach the generated report in to either a predefined document class or a predefined document number that is defined in document management.
DocumentTitle : The title in which the report is archived in to document management.
DocumentFileName : The file name in which the report is archived in to document management.
ConnectedLU / KeyRef : You can specify if the generated report should be attached to an application form as an attachment. In this case you have to specify the LU and key-value pair to uniquely identify an instance in the LU. For example, if you want to attach the 'Invoice' report, in to the 'Customer Invoice' form, you need to specify the LU as 'CustomerOrder" from the ConnectLU combobox and Invoice_no as the key and a value for that key. You can hardcode a value or retrieve the value from a xpath.
SendStream : If set to 'YES', you will get a stream notification once the report is archived in to document management. You can preview or navigate to the document by selecting the link in the stream.
.png)
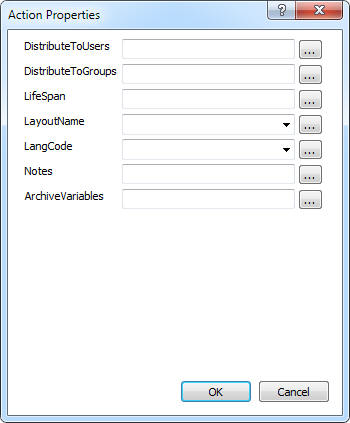
Distributing to users and/or groups
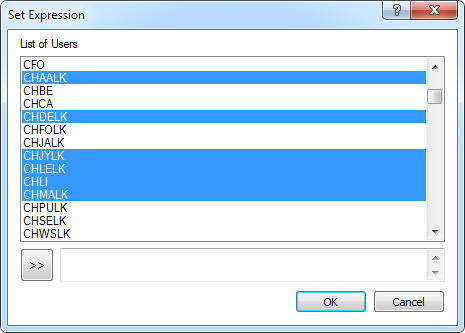
You will see a dialog as show above when you choose to "Distribute To Users" or "Distribute To Groups". You can individually select the users or groups or you can do a multiple select and add then to the list by selecting the ">>" button.
Setting Life Span, Layout, Language Code and NotesYou can simply type the value or choose a xpath or Report Context Variables which contain the value. You can also choose values from the combo box where available.
Setting Archive VariablesYou can add new archive variable with this action property. The format to add a variable is ArchiveVariableName:ArchiveVariableValue:ArchiveVariableType. You can add multipule Archive Variables by seperating them by a ',' character. (e.g. ArchiveVariableName01:ArchiveVariableValue01:ArchiveVariableType01,ArchiveVariableName02:ArchiveVariableValue02:ArchiveVariableType02)
The Archive Variable Type can be string, number or date denoted by S,N or D respectively. When specifying a date value the date format should be in the format of YYYY-MM-DD. You can use xpath or Report Context Variables values to construct your Archive Variable value.
Example : archVar01:Hello World:S,archVar02:1234567890:N,archVar03:2014-05-30:D
Report Rule Log will help you trace rule execution. This will be useful when
designing rules. Report Rule Log will give information on.
You need to set the "Report Rule Advance Logging" System Parameter to "ON' to enable Report Rule Logging.
Note: Double click the message field in the log to see multiple text rows. Some information might be hidden from view.
You can import/export a rule by selecting "Import Report Rules" and "Export Report Rules" context menu option shown in the Report Rule header section. You can select one or many Report Rules from the Report Rules Overview and import/export them from the "Import Report Rules" and "Export Report Rules" options in the context menu.
In addition to IFS standard Context Substitution Variables (CSV), the Report Rule Engine include a few special ones that represents the different properties and states found in the reporting process. You write them with a leading "[#" followed by the variable name and a trailing "]". Here is a full list of available variables.
Note: Many of these variables only have a value in the formatting context. i.e. when the report run just before formatting the report or in the plug-ins. Those variables will be empty when running the Archive action and when retrieving defaults for the Print Dialog.
| Variable | Notes |
|---|---|
| [#Copies] | Formatting context only |
| [#CurrentUser] | |
| [#CurrentLanguage] | |
| [#FromPage] | Formatting context only |
| [#ToPage] | Formatting context only |
| [#Email] | Formatting context only |
| [#LangCode] | Formatting context only |
| [#LayoutFile] | Formatting context only |
| [#LocaleCountry] | Formatting context only |
| [#LocaleLanguage] | Formatting context only |
| [#LocaleVariant] | Formatting context only |
| [#PrinterId] | Formatting context only. Can be either the logical printer or the physical printer |
| [#LogicalPrinterId] | Only when printing to a logical printer |
| [#RoutingPrinter] | Only when using the action "Print to Logical Printer" |
| [#PrintJobId] | Only when printing to a logical printer |
| [#ReportId] | |
| [#ResultKey] | |
| [#ReportTitle] |